Getting the Most from Human Organ Outline Icons in Your Projects
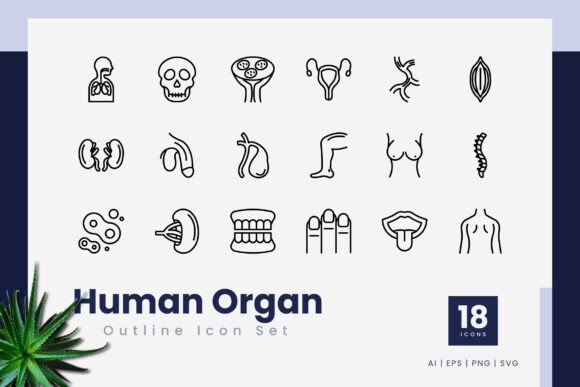
When you download a set like Human Organ Outline Icons, you are not just grabbing a folder of simple drawings. You are picking up a versatile toolkit that can elevate medical presentations, health apps, educational infographics, and wellness websites. This particular collection gives you 18 professionally crafted icons in a clean outline style, delivered across multiple vector and raster formats including .ai, .eps, SVG, and transparent PNG files. The strokes are fully editable, which means you can customize line weights, colors, and individual anchor points without starting from scratch.
Yet plenty of creatives, educators, and business owners run into the same frustrations when they first start working with icon sets. They end up with mismatched line thicknesses across a slide deck, blurry exports on a printed poster, or icons that look oddly disconnected from the rest of their brand identity. Fixing those issues after the fact can eat up hours of rework. The good news is that most of these headaches come from a handful of predictable mistakes, and once you know what they are, you can avoid them entirely.
Why People Choose This Icon Set Over Others
There are hundreds of medical icon collections online. What makes Human Organ Outline Icons stand out is the combination of simplicity and adaptability. Each organ is reduced to its essential silhouette, making the icons readable at tiny sizes on mobile screens and still crisp when blown up for a poster or banner. Because the set includes 100% vector files, you never lose clarity no matter how much you scale the artwork.
The collection covers core anatomy that most projects need: the heart, lungs, brain, stomach, liver, kidneys, and more. Having all of them in one consistent style saves you from the patchwork look that happens when you source organs from five different free icon sites. Consistency in line weight, corner rounding, and overall proportion is already built in, which is a huge time-saver for anyone building a unified visual system.
The Mistake of Treating All File Formats the Same Way
A common point of confusion lies in how people handle the different file formats included in the download. Opening a .ai or .eps file is the right move when you need to deeply edit the icon, adjusting stroke thickness or changing the shape of a ventricle on the heart. Dragging a PNG into a layout and then trying to enlarge it beyond its native resolution, however, is where things go wrong.
Raster files like PNG are built from a fixed grid of pixels. The transparent background is handy for quick placement, but scale a 512-by-512 pixel PNG up to fill a presentation slide and you will immediately notice soft, jagged edges. For print projects, that softness becomes even more obvious. The practical fix is simple: whenever you need to resize an icon significantly, reach for the SVG or .ai version instead. SVGs are particularly useful for web and app interfaces because they stay razor-sharp on any screen and contribute almost nothing to page load weight when coded inline.
Some users never open the vector files because they feel intimidating. But modern design tools like Figma, Affinity Designer, and even free alternatives like Inkscape accept SVG and EPS imports without trouble. You do not need to be an Adobe Illustrator expert to benefit from the editable stroke line feature. Even changing the stroke color globally across all 18 icons can be done in a few clicks once you understand layers and stroke properties.
Overlooking Line Weight Consistency Across Projects
Another subtle mistake happens when designers mix these outline icons with other icon sets in the same project. The Human Organ Outline Icons come with a specific default stroke thickness that defines their visual personality. If you pair them with heavily filled icons or icons with hairline strokes, the mismatch jumps out immediately. Your audience may not articulate why something feels off, but their brains register the inconsistency.
When you need to combine icons from multiple sources, take a few minutes to unify the stroke weights. Open the vector file for the organ icons and adjust the stroke to match the other set, or thicken the thinner icons from the other collection. This small step transforms a disjointed graphic into something that looks purposefully designed. For mobile app interfaces, consistent stroke weights also improve tap target recognition and overall usability.
Misunderstanding the Role of Outline Style in Communication
Outline icons carry a particular tone: clean, clinical, approachable, and modern. They are excellent for health and wellness brands that want to convey professionalism without the intimidating density of a detailed anatomical illustration. But there is a flip side. If your audience includes people who need to recognize organs for medical self-assessment or educational testing, a highly simplified outline may not provide enough visual information.
Understanding this context matters before you commit the icons to a project. For a yoga studio app that shows which organs benefit from certain poses, these outlines work beautifully. For a pathology textbook targeting medical students, you may need to supplement the icons with more detailed labeling or combine them with descriptive text. The icons do their job best when they support the message, not when they are asked to carry the entire educational weight alone.
Ignoring Color as a Communication Tool
Because the icons arrive as monochrome outlines, some users drop them into layouts without ever changing the default black or gray stroke. That can feel stark or cold, especially in wellness contexts where warmer tones build trust. The editable stroke nature of the vector files means you can assign colors that map to your brand palette or use color to differentiate organs by system: blue for respiratory, red for circulatory, green for digestive.
Color coding becomes especially valuable in infographics and dashboards where viewers need to scan quickly and understand groupings. A heart outlined in a soft red and lungs in a gentle blue create instant visual hierarchy without adding clutter. The mistake is assuming that "outline" means "colorless" instead of seeing the strokes as a canvas ready for your creative decisions.
What to Check Before Downloading or Purchasing
Not all icon sets with similar names deliver the same level of polish. Before you commit to a collection, look at the actual .ai or .eps file structure. Well-organized vector files group related elements on named layers and use compound paths where appropriate. Poorly organized files scatter objects across unnamed layers, making it frustrating to isolate and edit a single organ. The Human Organ Outline Icons set emphasizes easy drag-and-drop convenience and clean construction, which reflects thoughtful file preparation.
Also confirm the range of formats included. A set that only provides PNG files limits your future flexibility. The inclusion of .ai, .eps, SVG, and transparent PNG ensures you can handle quick mockups, web implementation, and print production without converting files through third-party tools. The readme.txt file that comes with the download typically contains usage tips and licensing details that are worth reading once before you deploy the icons commercially.
Practical Ways to Use the Icons Without Falling into Common Traps
Let's walk through a realistic scenario. You are building a landing page for a telehealth startup. You need icons that represent different specialties: cardiology, neurology, gastroenterology. You pull the heart, brain, and stomach icons from the set. Instead of dropping them onto the page as static PNG files at different sizes, you open the SVG versions in your code editor or website builder.
You set a consistent height for all three icons. You apply the brand's primary teal color to the stroke. You add a subtle hover effect that fills the outline gently, signaling interactivity if the icons serve as navigation elements. The result is a polished, cohesive interface that loads quickly and scales perfectly on retina displays. The alternative, using mismatched icons from random sources with varying stroke widths and colors, would have made the same page feel amateurish and inconsistent.
Preparing for Print Without Losing Quality
Print projects introduce their own considerations. If you are designing a poster for a health fair or an anatomical reference handout, you need the icons to hold up at large sizes. Opening the .ai or .eps file in a vector editing program lets you scale the artwork to poster dimensions without any degradation. You can also convert strokes to outlines at this stage, which prevents unexpected scaling behavior when sending files to a commercial printer.
One overlooked step is checking the minimum stroke width for your printing method. Very thin strokes that look elegant on screen can break up or disappear when printed on certain paper stocks or through specific printing processes. The editable stroke feature gives you the power to thicken lines slightly for print while keeping the screen version optimized. Maintaining both versions in your project file avoids last-minute scrambling before a deadline.
Making Smart Choices About File Management and Organization
After downloading the Human Organ Outline Icons collection, many people dump all the files into a general assets folder and move on. Months later, they cannot remember which format lives where or whether the SVG they found is the original or a modified version. A better approach is to create a dedicated icon library folder with subdirectories for each format.
Keep the original downloads untouched as a backup. Make copies into a working folder where you can edit, recolor, and resize. Name files descriptively: "heart-outline-red-2px.svg" tells you far more at a glance than "icon_03_final_final.svg." This small organizational habit saves you from the frustration of hunting through folders and potentially overwriting original files you cannot easily recover.
Understanding Licensing and Usage Beyond the Download
One of the most overlooked aspects of using any icon set is the license. Even a well-crafted collection with beautiful Human Organ Outline Icons comes with terms that define where and how you can use the graphics. Most commercial licenses allow use in personal and client projects, printed materials, digital products, and presentations. But restrictions sometimes apply to reselling the icons as standalone assets, embedding them in templates for mass distribution, or using them in logos without modification.
The readme.txt file included in the download typically spells out these terms clearly. Reading it takes two minutes and prevents legal gray areas that could surface later. If your project involves trademarking a logo that incorporates one of the organ outlines, you will likely need to modify the icon significantly or create an original derivative that qualifies as transformative work. When in doubt, reaching out to the creator for clarification is a professional courtesy that protects both sides.
Applying the Icons Across Multiple Mediums Effectively
The same heart icon that works in a mobile app menu may not feel appropriate as a hero graphic on a website unless you adapt it. On a large screen, an outline icon can feel sparse. Adding a soft background circle, pairing it with typography, or placing multiple organs in a thoughtfully arranged composition turns a single icon into a compelling visual feature.
For social media graphics, consider using the PNG versions with transparency to layer the organs over lifestyle photography or textured backgrounds. The transparency lets the background show through the open spaces of the outline, creating a sophisticated layered effect that purely filled icons cannot achieve. Experimenting with blending modes and opacity in your design software uncovers creative possibilities that go far beyond basic placement.
The set works equally well for internal business documents. Medical practitioners creating patient education handouts, personal trainers explaining body mechanics, and wellness coaches building slide decks all find that the clear, uncluttered style reduces visual noise and keeps attention on the information. When the graphics do not compete with the content, your message lands more effectively.
Steering Clear of the "Set and Forget" Mentality
Even the best icon set benefits from periodic review. Design trends shift, brand guidelines evolve, and what looked fresh two years ago can appear dated. The organ outlines themselves remain useful because anatomy does not change, but the way you style them, the colors you use, and the contexts where you place them may need refreshing.
Because the vector files are editable, you can revisit the original strokes years later and update them to match new branding without repurchasing or hunting down replacement assets. That long-term flexibility adds real value, especially for small businesses and freelancers who need their design resources to stretch across multiple projects and seasons.
Moving Forward Confidently
The difference between a project that looks polished and one that looks pieced together often comes down to the small decisions: choosing vector over raster when scaling matters, matching stroke weights across an interface, reading the license before publishing, and organizing assets so you can find them later. The Human Organ Outline Icons collection supplies the raw material in a high-quality, versatile format. What you build with it depends on the care you take in the steps that follow the download.
When you invest a little time upfront to understand the strengths of each file format and set yourself up with an organized asset library, you position yourself to produce cleaner work in less time. Whether you are designing a health tracking app, creating classroom materials, or enhancing a medical blog, these icons can become a reliable part of your creative toolkit, ready to adapt as your projects grow and change.